Recently I've decided to bite the bullet and turn my guest room into a multi-purpose craft/guest room. With the holidays nipping on our heels, I can't have fabric and thread strewn about my dining room during thanksgiving dinner! I put on Design Star and decided to give myself a little budget challenge. (Husband approved)
The Challenge: A multipurpose craft/guest room for €150 ($200) or less
The Contender: Me, a jobless American living in Sicily with a limited access to affordable furniture.
The Start date: Oct 15 (payday)
I've started to clean out the guest room. I already have a somewhat furnished guest room, extremely meager, but furnished. I have a twin bed & a woven rug--- I said meager! Pathetic. I went through some of the tote boxes of clothes and there might be a garage sale in the near future.

Time to poke around the internet for some ideas.
LOVE the pennant window treatment! I've been a little too into pennants lately. Also, check out the embroidery hoops as wall art! Super cute.

I see that they also used a table for a desk.. I will be adopting that idea. A friend of mine uses a simple table from the VIKA line at Ikea. I was concerned with the sturdiness of the table. I attempted to put my sewing machine on a folding table, that, my friends was a mistake! The table hopped up and down when the machine was working. My friend loves hers. SOLD. And at €30 it comes in within my budget.
I'm not a huge fan of the legs... simple. Make a curtain. Plus the curtain will hide any unsightly storage boxes I might have, as well as cords from laptops, hot glue gun, and my sewing machine. I do believe that the legs screw right into the bottom of the table top so there is no ledge to attach a rod for a curtain--- velcro might come in handy. Now I just have to find the right fabric. I'm leaning towards canvas, its neutral and won't clash with my Pottery Barn bedding (on sale, thank you!).
 This is a great idea for storing pens, scissors, brushes & all of those items you need in arms length. Ikea to the rescue yet again.

I can get the rail & 3 little tin baskets for €14 euro. (This brings our current total to €44). For even more storage for rulers and measuring tapes I can repurpose a RIBBA picture ledge (€5)-- i could even put a magnetic strip (€7), you know for holding knives, underneath it and get some baby food jars to hold things like pins, safety pins, needles, etc. Attach a small magnet to the top of the baby food jars and then it will just "hang" from under the ledge.


Time to look at shelves... Don't judge my drawing lol. It's pretty sad.. my no-thumb cat is even unimpressed. I found these bracket mounted wall shelves for €3,50 and the brackets for €3. (2 sets = €19, bringing our current total to €75)
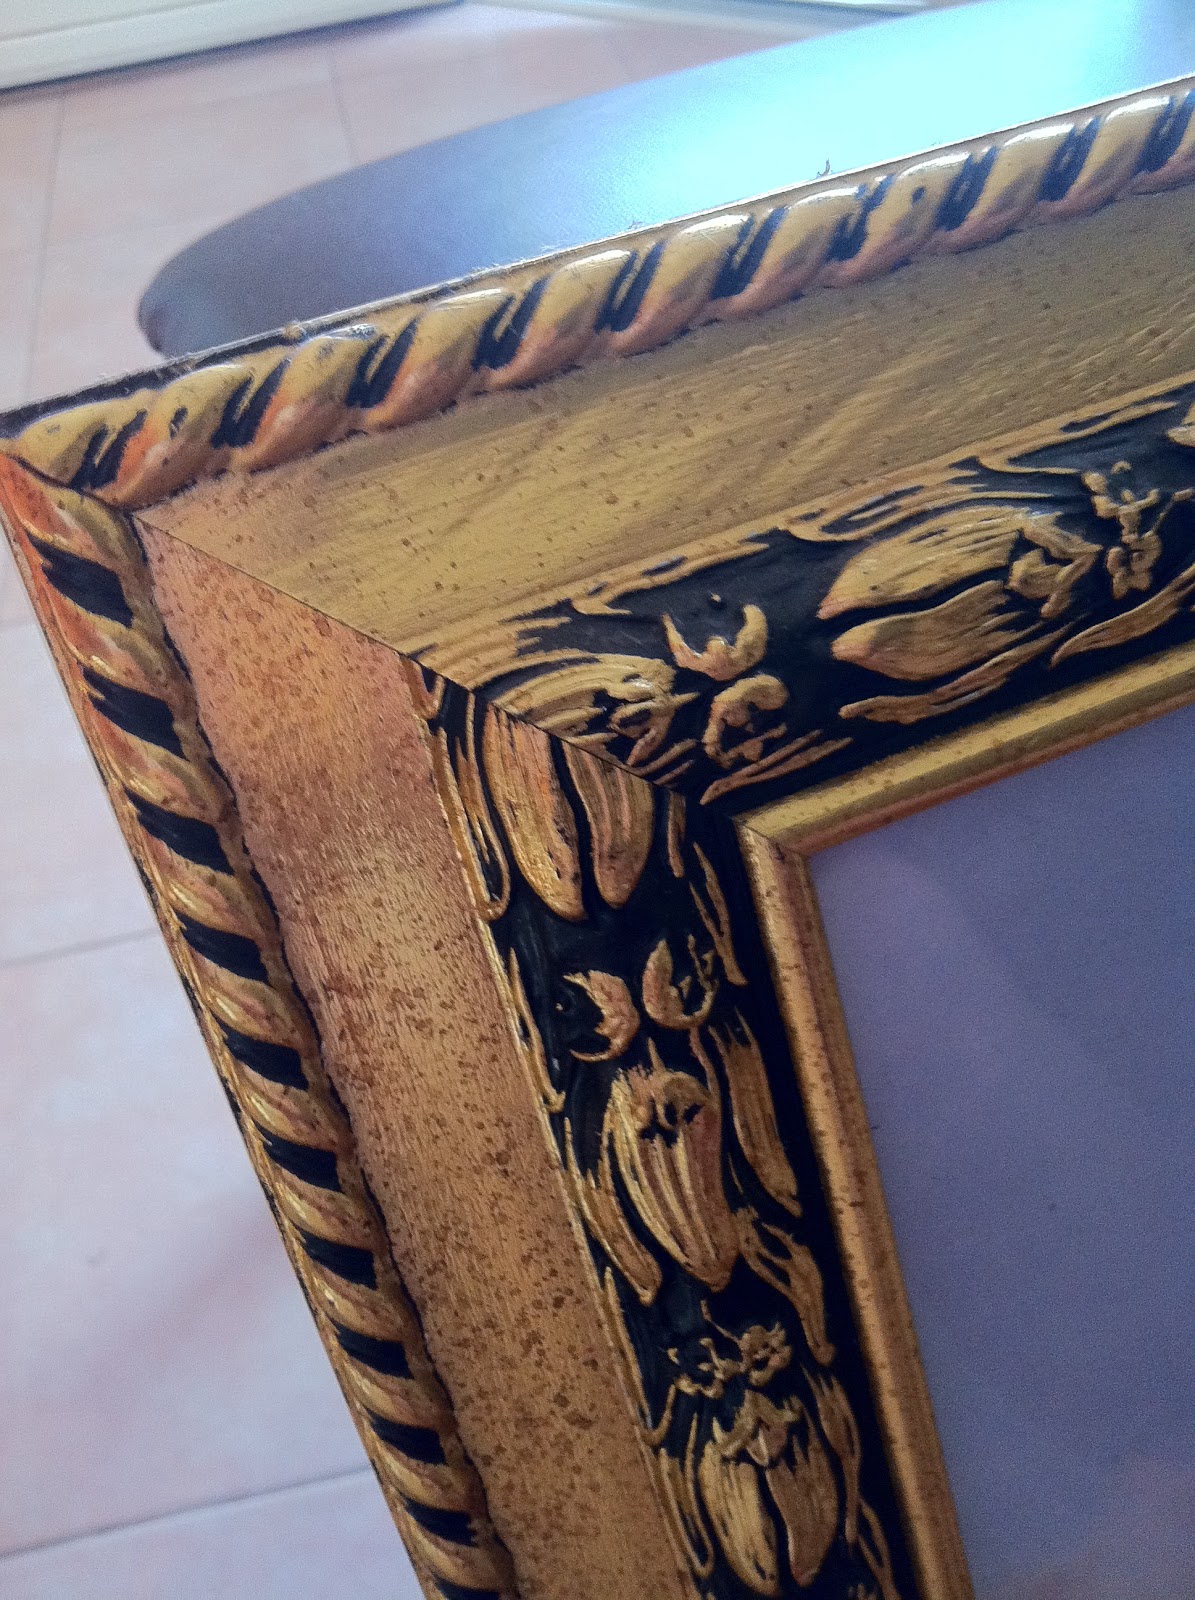
That sorry looking frame is another project entirely. I'm creating a burlap memo board. So far, I've only painted the frame. Here is your sneak peak.


I have a couple more things to tackle:
Window treatment
Storage units to go on the shelves
Step stool cause I'm short
Chair
Curtain for under the table
Utility cart
Relocate the bed so that it is a usable "daybed"
I've got my work cut out for me! But for now... BED!
LOVE the pennant window treatment! I've been a little too into pennants lately. Also, check out the embroidery hoops as wall art! Super cute.

I see that they also used a table for a desk.. I will be adopting that idea. A friend of mine uses a simple table from the VIKA line at Ikea. I was concerned with the sturdiness of the table. I attempted to put my sewing machine on a folding table, that, my friends was a mistake! The table hopped up and down when the machine was working. My friend loves hers. SOLD. And at €30 it comes in within my budget.
I'm not a huge fan of the legs... simple. Make a curtain. Plus the curtain will hide any unsightly storage boxes I might have, as well as cords from laptops, hot glue gun, and my sewing machine. I do believe that the legs screw right into the bottom of the table top so there is no ledge to attach a rod for a curtain--- velcro might come in handy. Now I just have to find the right fabric. I'm leaning towards canvas, its neutral and won't clash with my Pottery Barn bedding (on sale, thank you!).

I can get the rail & 3 little tin baskets for €14 euro. (This brings our current total to €44). For even more storage for rulers and measuring tapes I can repurpose a RIBBA picture ledge (€5)-- i could even put a magnetic strip (€7), you know for holding knives, underneath it and get some baby food jars to hold things like pins, safety pins, needles, etc. Attach a small magnet to the top of the baby food jars and then it will just "hang" from under the ledge.

Everything will be visible. Awe.. they are kinda cute huh? It might be time to try that carrot cake recipe that uses carrot baby food.

Time to look at shelves... Don't judge my drawing lol. It's pretty sad.. my no-thumb cat is even unimpressed. I found these bracket mounted wall shelves for €3,50 and the brackets for €3. (2 sets = €19, bringing our current total to €75)
That sorry looking frame is another project entirely. I'm creating a burlap memo board. So far, I've only painted the frame. Here is your sneak peak.

Window treatment
Storage units to go on the shelves
Step stool cause I'm short
Chair
Curtain for under the table
Utility cart
Relocate the bed so that it is a usable "daybed"
I've got my work cut out for me! But for now... BED!


